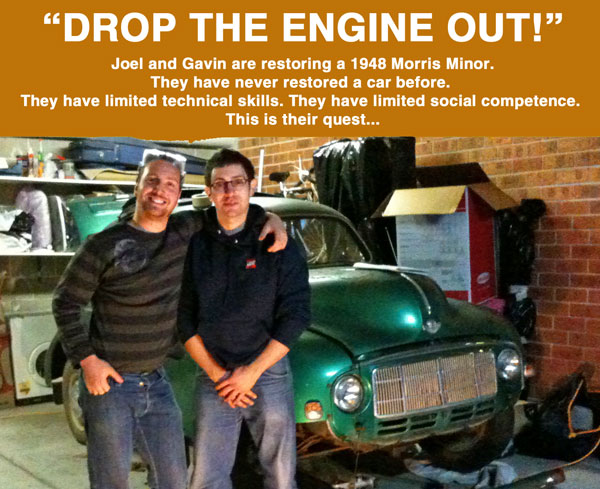
Well, things have slowed down a bit now. Gavgav has been applying to do his MBA in Cambridge, England, and was accepted into the program. A few weeks ago he headed off on his adventures leaving poor Joel without his partner in crime, and once again outnumbered by the demanding women in his family. So for the time being Joel is on is own (and will henceforth stop blogging in the 3rd person!)
Before Gav left, we reinstalled the brakes and began connecting up the hoses when we noticed a fair amount of corrosion on the rigid hoses connecting the front slave cylinders together, as well as corroded bleed nipples and various other washers and nicknacks. Unfortunately the corrosion was not limited to the hoses and the threads on the slave cylinders themselves seem to be beyond repair, so I'll need to replace all 4 front cylinders too :(
Once again comparing purchase quotes from Australia and England, the Australian quote came out as around $400 whereas purchasing from England and having them shipped over all comes to a total of $285, so I have recently placed the order which will hopefully get me moving again.
Apart from that I still need to get the cylinder head machined, and then with any luck I'll be able to get this old fella on the road again!
Friday, September 17, 2010
Friday, July 2, 2010
Brakes done! Cylinders, valves & cooling
In the last 2 weeks we have re-assembled all the wheel cylinders and reinstalled them, along with new brake pads and the springs which hold them in place. We now have the job of replacing the master cylinder which is a bit of big deal, as it involves reconstructing the front suspension and reinstalling the torsion bar.
In the meantime we are also thinking about the engine itself. As we described in previous postings we are having trouble removing a rusted spiggot from the underside of the cylinder head. As a result, we have resorted to removing the cylinder-head to give ourselves better access to the difficult part. This in turn gave us access to the valves and tappits. We've noticed that the valves are heavily clogged up with carbon, and were wondering how important it is to clear it all off, and if it is critical, what is the best way to remove the carbon? We have tried a small wire brush on a dremmel, however the tough carbon chewed through the brush fairly quickly.


In addition we still have the issue of our cooling system completely clogged with a rusty goop. We need to find a way of cleaning it out. Our first thought is to simply get the engine working and then run a hose through the system without the radiator attached, thereby flushing the rust out.


Saturday, May 29, 2010
Thermostat
We've finally managed to clear the remaining part of the broken thermostat bolt from the engine head so that we can insert a new one.
We progressively used larger and larger drill bits...

 There's the hole in question - we then needed to re-tap the thread so that we could get the new bolt to screw in properly. Neither of us has ever done anything like this before so lots of fun...
Here's the thread tapping tool:

And.. success... The thread cutting tool manages to dislodge the remaining shell of the old bolt - it actually just unscrewed with the tool as we unwound it from the hole.
 And here's the outcome - new bolt in place.. The other two already screw in properly.
 Here's the tools we used sitting neatly in the Morris' convenient battery tray / tool bench.

When we removed the exhaust pipe, Gavin was a little too forceful with the removal. The manifold snapped clean in half:

Just removed the old manifold, involving removing the carburetter etc..

Here's the engine sans-manifold.
We progressively used larger and larger drill bits...

 There's the hole in question - we then needed to re-tap the thread so that we could get the new bolt to screw in properly. Neither of us has ever done anything like this before so lots of fun...
Here's the thread tapping tool:

And.. success... The thread cutting tool manages to dislodge the remaining shell of the old bolt - it actually just unscrewed with the tool as we unwound it from the hole.
 And here's the outcome - new bolt in place.. The other two already screw in properly.
 Here's the tools we used sitting neatly in the Morris' convenient battery tray / tool bench.
When we removed the exhaust pipe, Gavin was a little too forceful with the removal. The manifold snapped clean in half:

Just removed the old manifold, involving removing the carburetter etc..


Here's the engine sans-manifold.

Tuesday, May 18, 2010
The Finished Product

Here's a photo of a similar model which we found on the net. Hopefully ours will look something like this in the end!
Location:Campbell St,Newtown,Australia
Monday, May 17, 2010
Back on track - Gearbox and Brakes
Back on track!
Now that the gearbox is back in with the new clutch plate and the prop shaft has been re-installed, its time to get the brakes back together.
We ordered replacement rubber cups for all the slave cylinders as well as the master cylinder. When we opened up the master cylinder originally, the rubber boot was perforated with brake fluid easily leaking out where the rod moves into the master cylinder from the pedal assembly.
We've cleaned up the slave cylinders with turps and dried them off. Joel now puts on a coat of brake fluid to the parts before we put in the replacement rubbers and reinstall them onto the car.

You can see the master cylinder here:
 Joel had a little bit of a rough time getting it all to fit back together but it seems to have all worked perfectly now.
Here we're just bathing the new rubbers in brake fluid before their installation.

Now that the slave cylinders are all refurbished with their new rubber components, we decided to see if we could get the brake assemblies back together. And it worked! We used the new brake shoes and springs that we bought from the UK and cleaned up the adjustment pieces (that sit between the cylinder and the brake shoe to allow you to increase or decrease the distance to the drum).


So now that that's done - all that's left until we can for a drive is to to get the rear brakes done too, fit the drums, get the pedal assembly back together, fit the clutch linkage cable, repair the thermostat housing, fit the new exhaust, put the driver's side front suspension back together and we're good...
Might be a while, given the pace we work at...
A few small victories!
Its been a long while since we've made any progress - but not after a busy period for both of us, we have finally started making progress again.
GavGav has been having trouble with his primary vehicle - an old german gas guzzler. Due to his fiscal conservatism (he's cheap), he decided not to purchase an original Mercedes replacement return pipe for the water cooling system that runs along the engine - but instead wanted to attempt to fabricate a replacement using copper pipe.
Using the same ethos as we have been so far with the Morris Minor, we thought we'd have a go - whats the worst that could happen?
Unfortunately a little too much force and not enough heat resulted in us snapping the piping during the last bend :(

As mentioned in an earlier post, we managed to remove the gearbox and gave it a much needed cleaning. We have made the decision not to crack the gearbox open for the time being, due to the complexity of the procedure, and the extra equipment we'd need to put it all back together again.
Instead we're pushing to get some short-term wins - and just get the car moving.
Things we have yet to do:

We've now turned our attention back to the brakes, and after a kitchen-table session of cleaning and preparing the master and slave cylinders we have re-assembled them and installed the 4 front slave cylinders as well as putting in our new brake shoes.
We're really enjoying completing these small milestones and can finally see a light at the end of the tunnel (as far as getting her driving).
Next we'll get the rear brakes done followed by the relatively mammoth job of installing the master cylinder and the re-assembly of the front suspension and torsion bar. We'll also have another go at drilling and re-threading that pesky thermostat housing bolt!

We attempt to tap a new thread into the engine block.
We need to drill more!
GavGav has been having trouble with his primary vehicle - an old german gas guzzler. Due to his fiscal conservatism (he's cheap), he decided not to purchase an original Mercedes replacement return pipe for the water cooling system that runs along the engine - but instead wanted to attempt to fabricate a replacement using copper pipe.
Using the same ethos as we have been so far with the Morris Minor, we thought we'd have a go - whats the worst that could happen?
Unfortunately a little too much force and not enough heat resulted in us snapping the piping during the last bend :(

Attempting to fabricate a new pipe for GavGav's Merc
As mentioned in an earlier post, we managed to remove the gearbox and gave it a much needed cleaning. We have made the decision not to crack the gearbox open for the time being, due to the complexity of the procedure, and the extra equipment we'd need to put it all back together again.
Instead we're pushing to get some short-term wins - and just get the car moving.
Things we have yet to do:
- finishing the brakes
- re-installing the gearbox
- installing the new exhaust
- completing the repairs on the thermostat

GavGav bolts the prop-shaft to the diff
We've now turned our attention back to the brakes, and after a kitchen-table session of cleaning and preparing the master and slave cylinders we have re-assembled them and installed the 4 front slave cylinders as well as putting in our new brake shoes.
We're really enjoying completing these small milestones and can finally see a light at the end of the tunnel (as far as getting her driving).
Next we'll get the rear brakes done followed by the relatively mammoth job of installing the master cylinder and the re-assembly of the front suspension and torsion bar. We'll also have another go at drilling and re-threading that pesky thermostat housing bolt!

We attempt to tap a new thread into the engine block.
We need to drill more!
Friday, March 19, 2010
Rear Brake Cylinder Bits... Advice needed!
We're moving slowly now, trying to get the brakes all together...
Here's a diagram of the Morris Minor brake rear slave cylinder:

Notice how there is a piston and dust cover in one piece on the right.
Here's a picture of that piston and dust cover piece from one of the slave cylinders of our car:

As you can see in this image - the dust cover cap has come off of the piston.. Looks like it was originally tac-welded.
Any suggestions for how we can get them re-bonded???
Subscribe to:
Posts (Atom)